Loading.....
 Back to blog

Streamlining Payments in React Native: Easebuzz Integration for iOS and Android
Efficient payment integration is a critical aspect of any mobile application, and React Native provides a robust framework for developing cross-platform apps. For businesses seeking a seamless payment solution, Easebuzz offers a versatile gateway that caters to both iOS and Android platforms. In this blog post, we'll delve into the steps required to integrate Easebuzz into React Native applications, ensuring a smooth payment experience for users on both major mobile platforms.
Understanding Easebuzz
Easebuzz, a comprehensive payment gateway solution, simplifies the payment process for businesses by supporting various payment methods such as credit/debit cards, net banking, and digital wallets. It's designed to meet the diverse needs of businesses, from startups to enterprises, making it a suitable choice for React Native developers aiming to implement secure and user-friendly payment functionality.
Integration Steps for React Native (iOS and Android)
Step 1. Create an Easebuzz Account: Begin by registering for an Easebuzz account. Provide necessary business details and undergo a simple verification process to access your dashboard.
Step 2. Generate API Keys: In the Easebuzz dashboard, generate API keys. These keys will serve as the secure link between your React Native app and the Easebuzz platform.
Step 3. Install Dependencies: In your React Native project, install the required dependencies,
including the Easebuzz SDK and any additional packages
needed for network requests.
npm install $(npm pack
Android Configuration
Example: npm install $(npm pack HomeDirectory/SDKfolder/react-native-easebuzz-kit | tail -1)
For React Native 0.59 and lower react-native link react-native-easebuzz-kit
To configure Android setup and configuration into your application you have to follow the below steps:
- Copy peb-lib-android-x.aar file into the app/libs/ folder of your application (If libs folder is not there, please create it manually).
- Add the below android proguard rules.
- To add the SDK into your app, open the build.gradle module and add the following lines with the respective section. If the following section already exists in file then only add lines into their respective section.
- Add multiDexEnabled into defaultConfig
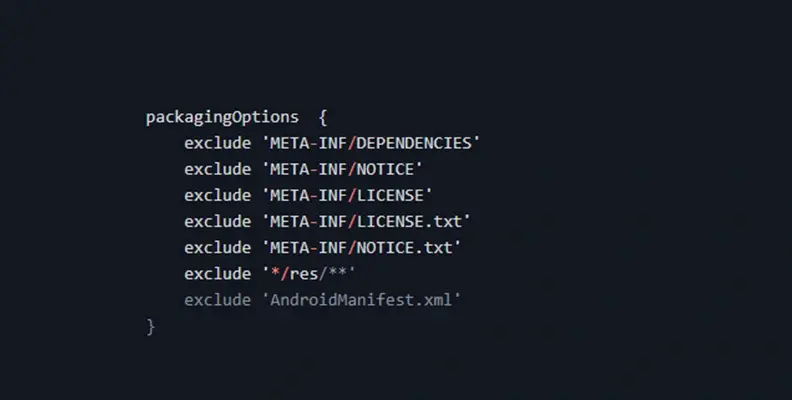
- Add the following lines to packagingOptions
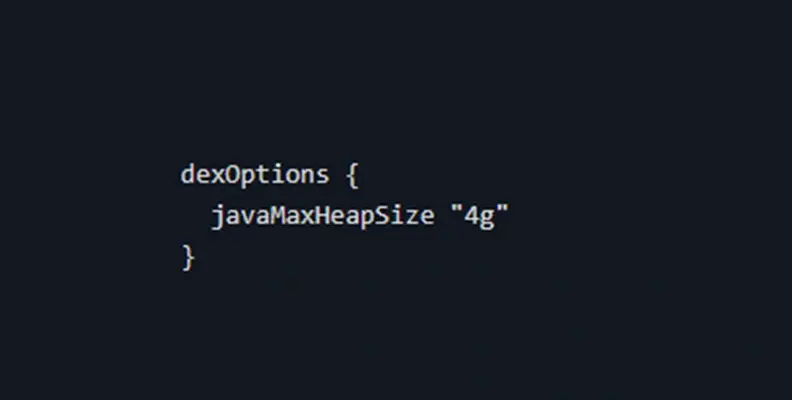
- Add the following lines to dexOptions
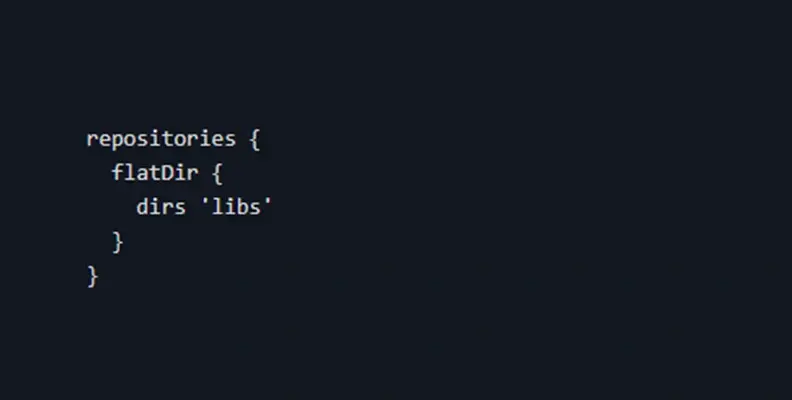
- Add the repositories section as follows
- Add Dependencies

The following all mentioned dependencies are mandatory for the sdk. If any of the following dependencies you are already using into your app then you do not require to add these particular dependencies.

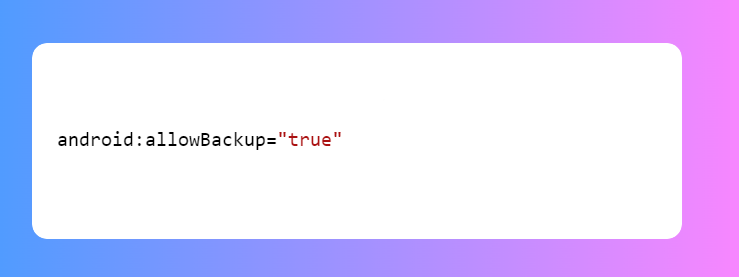
Change allowBackup value to true in
To open the upi app, you must add the below lines outside
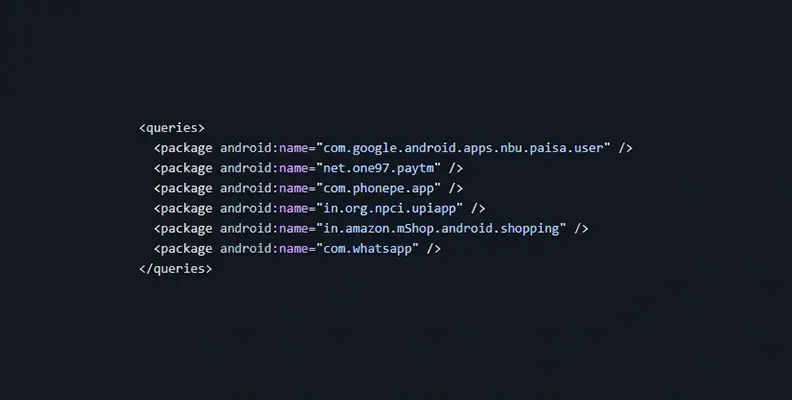
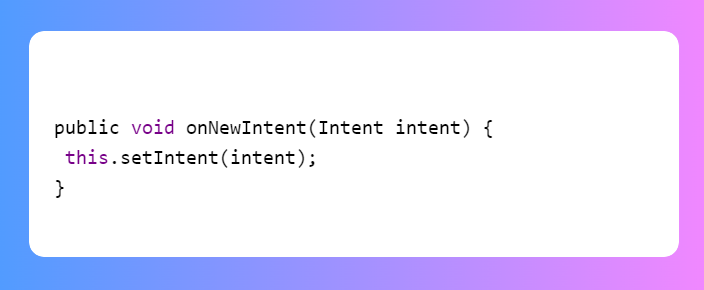
Add the below code in your launcher activity of the app

iOS Configuration
To configure iOS setup and configuration into your application you have to the below steps:
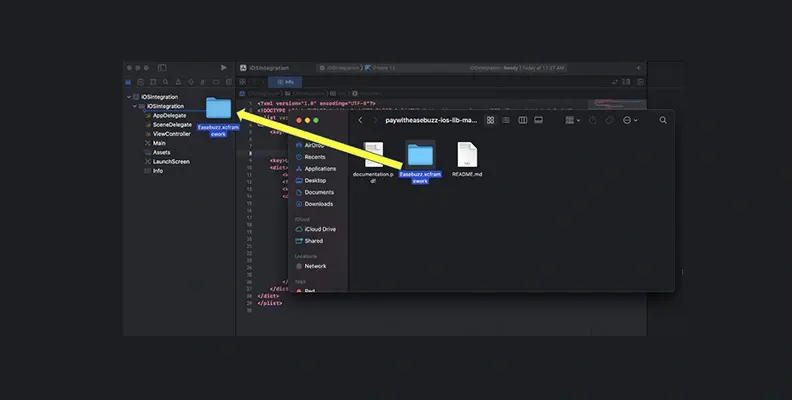
- Copy Easebuzz.xcframework of your application in embedded binaries.
- Press + and add framework using ‘Add other’ button.
-
Set Always embed & sign from frameworks and Libraries and swift standard libraries to YES from project
build settings.
ALWAYS_EMBED_SWIFT_STANDARD_LIBRARIES = YES - As per your react native version run below command
For React Native 0.60+
- open podfile (change the platform from iOS 9.0 to 10.0)
- cd ios && pod install && cd .. (CocoaPods on iOS needs this extra step)
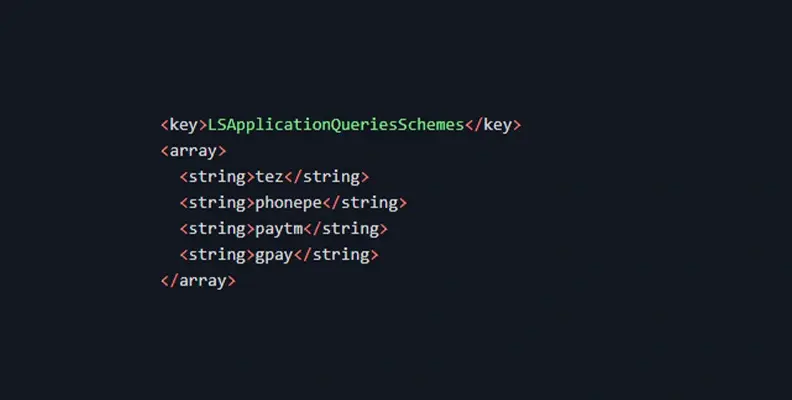
- To open upi psp app, you must make the following changes in your iOS app's Info.plist file.
Sequence of Build Phases
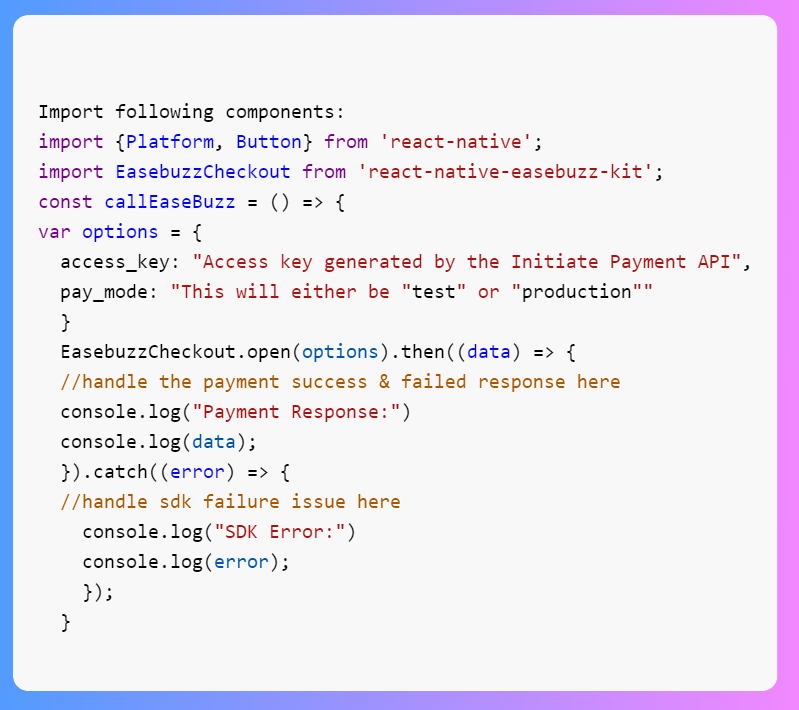
After having successfully set up the SDK configuration and Initiate Payment API at your backend, write the below code into Javascript to start payment on the click of Pay button from your app.
Conclusion
By following these steps, React Native developers can seamlessly integrate Easebuzz into their applications for both iOS and Android platforms. This comprehensive guide aims to empower developers to enhance the user experience by providing secure and hassle-free payment options. Stay informed by referring to Easebuzz documentation for any updates or additional features that may further optimize your payment integration. With Easebuzz, you can confidently offer a streamlined payment experience to your users on both major mobile platforms.


Menu
Contact Us


